
Photoshop Tip: Soft Proofing
Soft Proofing: Non-contact, non-hard copy, sample of a job to be printed, displayed on a precisely calibrated and high resolution computer monitor. Soft proofs require an accurate color management software to show the exact hues and brightness of the image to be printed.* OR in other words… A way for you to see on your monitor what your image will look like when it is printed on your media of choice.
This is a great way for you to see what your image might look like before it goes to print in a magazine, newspaper, or even a nice archival print.
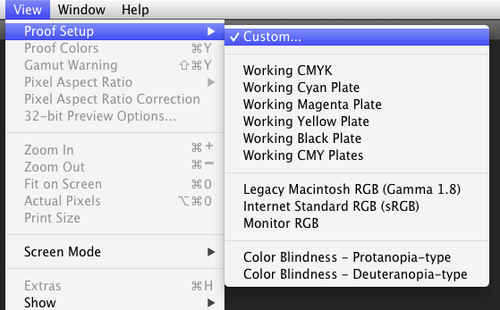
Soft proof can be found in the tool bar under View>Proof Setup>Custom
You will then see this box pop up.
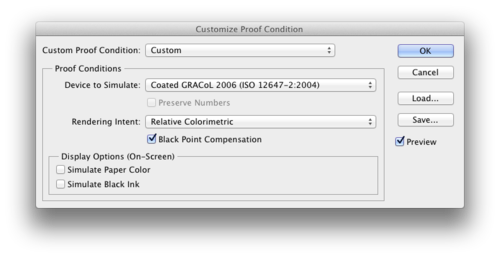
You want to choose whatever profile that your printer is going to print on from the drop down menu and click OK.
If you are within the gamut of your chosen profile then you should not see a big difference from your file to the soft proof. If you want to go from the original to the soft proof press Command + Y to toggle between the views.
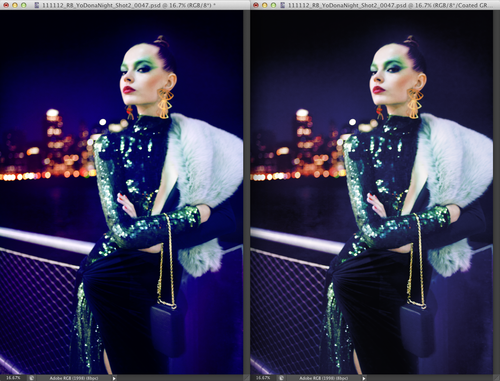
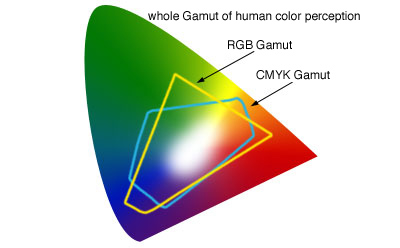
You can see here that on the right is the original file and the left the soft proof. And clearly it is not in the gamut of the profile (GRACoL2006- this is the widest CMYK profile you can print on) The blues are not reaching the saturation and glow that it is in RGB. This happens when the gamut of the RGB profile that you are working in is larger that the CMYK profile that you are printing. The diagram below will make it a bit more clear. Know that ALL profiles have different gamuts.
So remember when editing your images to always soft proof before going to print, especially when the colors in your image are saturated. It’s most likely in that case that a CMYK profile will not print those colors. Your best bet is to re-work your file to get the color that will print and compliment your image, instead of the dull washed out color that it will default to when printing.
happy photoshopping!
-Nicole
*source:BusinessDictionary