
Photoshop Tip: Window > Arrange > New Window
Photoshop Tip: Window > Arrange > New Window
I love using this trick in a couple of situations.
1st situation: Architecture : 2 additional windows in order to zoom in for precise perspective control.
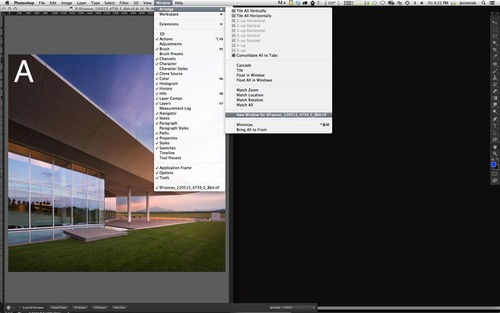
Open your image (lets call this window A)
Then, go to Window > Arrange > New Window to open the first new window (lets call this window B)
Do it again and open your second “new window” (lets call this window C)
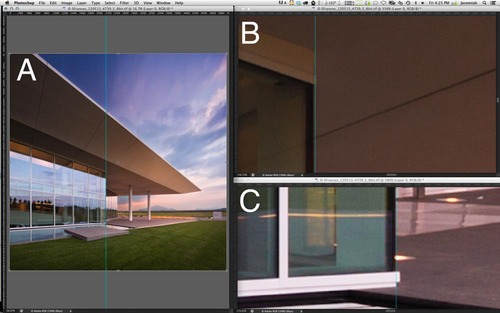
Go back to window A and drop a guide line on the edge line of your image that you plan to straighten. Go to window B and zoom into the top part of that edge. Go to window C and zoom into the bottom part of the edge line. Now go back to window A and hit Cmmd T to transform your image, and make your perspective adjustment. Watch your edge lines in windows B and C to make sure you don’t go too far, or not enough. (See screen shots 1 & 2).
2nd Situation: Fashion : 1 additional window to see fine retouching adjustments take place on whole image, while retouching “zoomed in”.
(See image “3”)
Open your image (Again, Window “A”)
Open your second window (Window “B”)
Click window A, and zoom into your retouch location.
Click on window B and zoom in a little bit to your retouch location.
Go back to window A and start retouching. Notice, as you retouch on window A, your alterations will be visible in window B, so you can see if you’ve missed a spot or over retouched. This is easier than zooming in, and zooming out all day long.

Enjoy :)
- jeremiah